How to make a Fair Isle pattern in Procreate
A fun winter themed pattern to add to your Procreate toolkit!

If you'd prefer to watch this tutorial you can watch it on YouTube below.
If you'd prefer a written step-by-step, keep scrolling!
A Fair Isle pattern is a traditional knitting technique that originated in Fair Isle, a small and remote island off the coast of Scotland.
Fair Isle has grown in popularity over the years and you can see it on all sorts of winter themed products, particularly jumpers!
In this tutorial we're going to explore how to make a simple repeating pattern in Procreate based on the Fair Isle technique.
These types of patterns work well on their own or they also make fantastic secondary or blender prints. You can see below how I have made a little trio of patterns using a monochrome version of this Fair Isle print as a blender pattern (The one in the middle!)


Setting up the canvas
Start by creating a new canvas in Procreate at 12x12 inches and 300 DPI.
Now go up to the spanner icon, toggle drawing guide on and tap edit drawing guide. On the panel on the bottom, tap the number next to grid size and change it to 1 inch squares.
This now gives us a helpful template to work with as the motifs need to be evenly spaced.

Creating an anchor line
As Fair Isle is a very structured pattern, it really helps to start with an anchor line that will be the basis for the placement of the other motifs in your pattern.
However you want to develop your Fair Isle pattern, (and there will be lots of scope to add in your own ideas and motifs!) I would highly recommend you started with this simple anchor line.
Using the grid lines to help you draw a simple zig-zag line across the canvas. You can see I am using the 1 inch squares as my guide, going from corner to corner. If you want the individual lines to be absolutely straight as I have done here you can draw the line and hold down your apple pencil until it snaps straight.

Once you have made your way across the canvas we need to make this repeat at the edges, so make two temporary diagonal marks in the top left and bottom right corner of the canvas.

Now duplicate the layer four times and make your repeat as normal: With snapping and magnetics on, move each layer to a corner of the canvas, so the temporary marks end up in the middle of the canvas, and the zig-zag line will have moved places too.

Merge the four layers together and rub out the temporary marks.
Now you can fix the repeat line which you can see I have circled below, it will be right in the middle. As we used the grid lines to guide us, there probably won't be much to fix but zoom in and make sure it is all lining up nicely, you may need to go over it with your original pen and colour to make sure it is smooth.
Now you can leave the anchor line where it is, or you can move it up or down your canvas. If you decide to move it, ensure snapping and magnetics is on and you move it straight up and down, otherwise you will get a broken repeat at the sides.
I'm going to carefully move mine straight up to roughly where it started. Now I know the lines going off the canvas at the sides are in repeat.

Gathering inspiration
Now you have your anchor line in place, you can start to get creative!
Fair Isle tends to feature Christmas or winter themes, but it doesn't have to. You can take your pattern in any direction you'd like, perhaps even fitting the motifs to work with a collection you're already creating.
However, to make a recognisable Fair Isle, you might want to include some of the typical shapes such as diamonds, zig-zags, stars and crosses.
I've collected some Fair Isle patterns together in this Pinterest Board which you can take a look at to get some ideas of motifs and shapes for your own pattern.
Creating your pattern
Now you simply need to fill up the canvas, using a mixture of horizontal lines (either straight or zig-zag) and a variety of interesting shapes and motifs.
To create the symmetrical and geometric shapes, it's best to use the symmetry function in Procreate to get it just right. This will involve creating one motif, then moving it into place.
First of all I'm going to create a simple diamond shape that will fit nicely underneath the zig zag. So I'm going to go back up to edit drawing guide and change it to symmetry, selecting vertical symmetry.
Then start a new layer and make sure drawing assist is selected for that layer and create your diamond shape.

Once you have one in the correct place, revert back to 2D grid so the 1 inch squares come up and you can duplicate the diamond layer and move it along, using the grid squares to get it in the right place.
NB: When duplicating a motif, ensure you are duplicating the original each time, rather than duplicating the duplicates. Duplicating something over and over again in Procreate will cause a loss in quality and will mean your motifs could look fuzzy. Doing it once, however, does not cause any noticeable difference.
Do this for the remaining spaces as shown below, then duplicate one more time and hide this layer (we will come back to it in a minute).
You can see now we have filled most of the spaces except for the one that comes off the canvas. So we need to create a repeat in the usual way and add in the final diamond.
So, ensure all your diamond shapes are on one layer (except the spare one that is hidden) and make some temporary diagonal marks in the corners as we did before.

Make your repeat by moving each layer to the corner, so that the diagonal marks end up back in the middle. You will see that the diamonds have moved on the canvas and there is one space left to fill in.

Merge the diamond layers together and then erase the temporary marks and find your spare diamond shape in the layers panel. You can now move this diamond in the space, using the grid to help you line it up correctly.
Merge the spare diamond layer with the other diamond layers, and you can now move this layer up to where you had it originally. For this make sure snapping and magnetics are on, and that you don't move it at all to the right or left as that will break the repeat. (Also remember to rub out the temporary markings!)
Not all of your motifs will need to be split across the canvas. I created the Christmas tree motif below using vertical symmetry in the same way as the diamonds, but the way I positioned them meant they fitted perfectly across the canvas without the need to match them up on each side.

As well as using vertical symmetry for your motifs you can experiment with quadrant and radial symmetry too for some of your motifs.
The geometric star pattern below is made in exactly the same way, but using radial symmetry.

If you want to create any horizontal lines across your canvas (and this is very in keeping with traditional Fair Isle patterns!) the best way to do this is to use vertical symmetry and draw from the edge of the canvas to the middle. When it meets in the middle hold your apple pencil down and then tap down with a finger on your other hand, this will make it snap into a horizontal line. The fact that it is in vertical symmetry will mean it already repeats at the sides.

Using these techniques, slowly build up your pattern with varying motifs and lines. It's really up to you how you build it up but you can always go back to the Pinterest board if you're stuck for ideas.
Top Tips
Try to keep each colour on a separate layer. This will make it easy to come back and recolour it later on.
You can also add a background colour as a base layer.
To create a monochrome version, merge all your motifs onto one layer (ensure you have duplicated your canvas to do this!), alpha lock the layer, choose your colour and tap fill layer. Monochrome versions of these work so well as blender prints in a collection!
Share your pattern!
I would LOVE to see what you create using this tutorial. If you'd like to share your work, you can tag me on Instagram @jasminehnatkova or send me an email at: jasmine@jasminehnatkova.com
If you have any questions, or need some clarification on any of the steps, feel free to leave a comment in the comments section below.
Keep learning
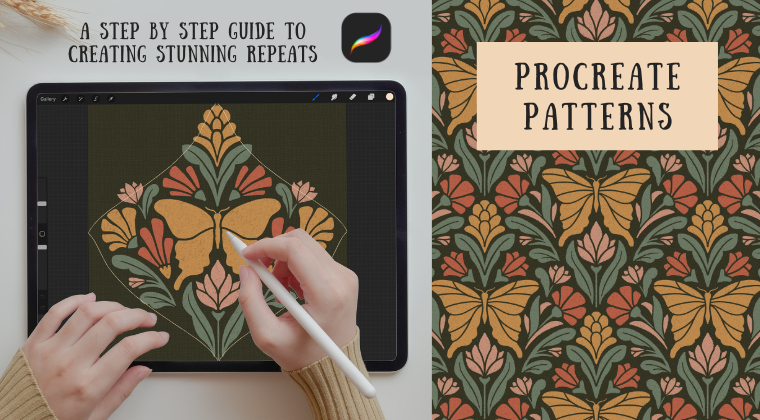
If you'd like to go deeper in your surface pattern learning journey, I have two classes which are suitable both for beginners and pros and take you step by step through the pattern making process in Procreate. Click on the images below to learn more!


Thanks for another easy to understand, but thorough, explanation and demo, Jasmine! :)